Since the first release of Cart Viper our DotNetNuke store we have supported a template based design and layout within our module. This allows the module to fit perfectly within a site simply by customising some XHTML files. Within the template files we have tokens which are replaced with data by the template engine when viewing the the store in a browser.
With the release of 1.4.0 we’ve taken this a step further and now allow you to insert skin objects into a template. The skin object will then be rendered into the template when browsing the store just like how we replace tokens.
Simple Skin Object Example
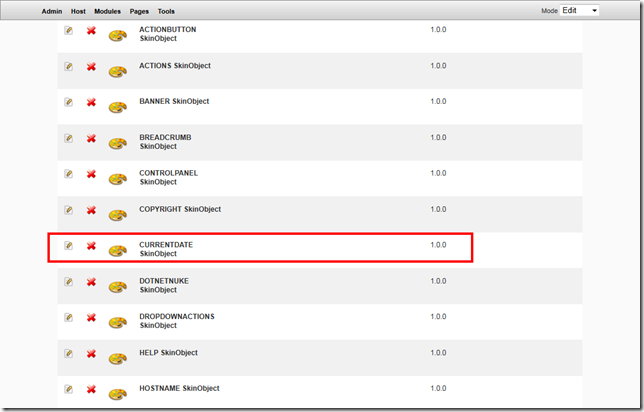
An existing skin object which comes as standard with DNN is the CURRENTDATE skin object, this when added to a template will output the current date.

As a very simple demo I’m going to modify the Product Detail (ProductDetail.htm) template to output this skin object after the model number at the top of the page.
To inject a skin object into a template we use [SKINOBJECT:NAME] where name is the skin object name, in this case CURRENTDATE.
- <div class="StoreDetailContainer">
- <div class="StoreDetailContainer-Content">
- <div class="Normal productDetailPadding">[EDIT][MODELNAME] - [MODELNUMBERVALUE] [SKINOBJECT:CURRENTDATE]</div>
- <div class="Normal productDetailPadding">
- [MEDIUMIMAGE]
- <div style="clear:both;"></div>
- [ADDITIONALIMAGESGALLERY]
- <div style="clear:both;"></div>
- [DESCRIPTION]
- </div>
- <div class="StoreClear productDetailPadding">[MSRP]</div>
- <div class="StoreClear productDetailPadding">[PRICE] [VATPRICE]</div>
- <div class="Normal genericColour productDetailPadding">[AVERAGERATING]</div>
- <div class="productDetailPadding">[ADDTOCOMPARISONLIST]</div>
- <div>[EMAILAFRIEND]</div>
- <div>[PRODUCTVARIANTS]</div>
- <div class="productDetailPadding">[PRODUCTVISUAZLIER]</div>
- <div class="genericColour addToCartWrapper">[ADDQUANTITY] [ADDTOCART]</div>
- <div>[ADDTOWISHLIST]</div>
- <div style="clear:both;"></div>
- <div class="Normal productDetailPadding">[FACEBOOKLIKEBUTTON]</div>
- </div>
- </div>
<div class="StoreDetailContainer">
  <div class="StoreDetailContainer-Content">
    <div class="Normal productDetailPadding">[EDIT][MODELNAME] - [MODELNUMBERVALUE] [SKINOBJECT:CURRENTDATE]</div>
    <div class="Normal productDetailPadding">
        [MEDIUMIMAGE]
        <div style="clear:both;"></div>
        [ADDITIONALIMAGESGALLERY]
        <div style="clear:both;"></div>
        [DESCRIPTION]
    </div>
    <div class="StoreClear productDetailPadding">[MSRP]</div>
    <div class="StoreClear productDetailPadding">[PRICE] [VATPRICE]</div>
	<div class="Normal genericColour productDetailPadding">[AVERAGERATING]</div>
    <div class="productDetailPadding">[ADDTOCOMPARISONLIST]</div>
    <div>[EMAILAFRIEND]</div>
    <div>[PRODUCTVARIANTS]</div>
    <div class="productDetailPadding">[PRODUCTVISUAZLIER]</div>
    <div class="genericColour addToCartWrapper">[ADDQUANTITY] [ADDTOCART]</div>
     <div>[ADDTOWISHLIST]</div>
    <div style="clear:both;"></div>
    <div class="Normal productDetailPadding">[FACEBOOKLIKEBUTTON]</div>
  </div>
</div>
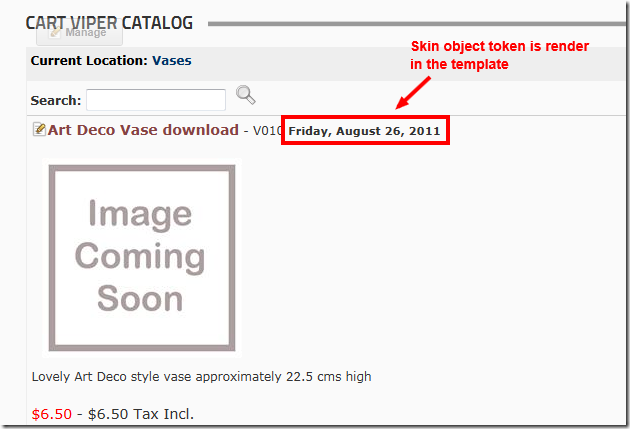
When we then view the product details page you can see we’ve added the current date to the template.

Skin objects are regular ASP.Net objects so they can contain properties, using our template we can set values for the properties using this syntax.
[SKINOBJECT:MYSKINOBJECT(propertyName1,propertyValue1,propertyName2,propertyValue2,…)]
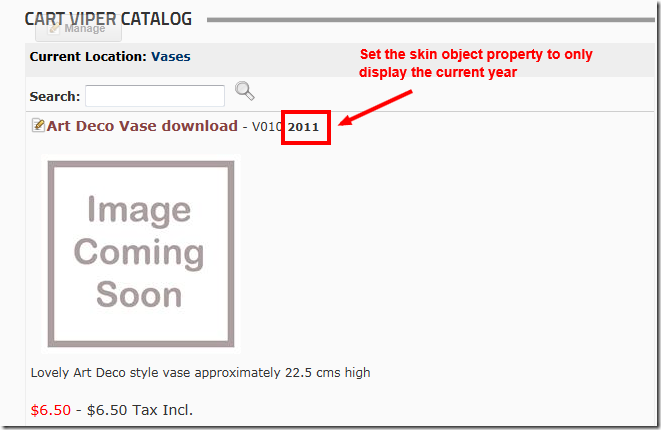
So we could set the property DateFormat on the CURRENTDATE skin object to allow us to just display the year.
Here is our template with the property set.
- <div class="StoreDetailContainer">
- <div class="StoreDetailContainer-Content">
- <div class="Normal productDetailPadding">[EDIT][MODELNAME] - [MODELNUMBERVALUE] [SKINOBJECT:CURRENTDATE(DateFormat,"yyyy")]</div>
- <div class="Normal productDetailPadding">
- [MEDIUMIMAGE]
- <div style="clear:both;"></div>
- [ADDITIONALIMAGESGALLERY]
- <div style="clear:both;"></div>
- [DESCRIPTION]
- </div>
- <div class="StoreClear productDetailPadding">[MSRP]</div>
- <div class="StoreClear productDetailPadding">[PRICE] [VATPRICE]</div>
- <div class="Normal genericColour productDetailPadding">[AVERAGERATING]</div>
- <div class="productDetailPadding">[ADDTOCOMPARISONLIST]</div>
- <div>[EMAILAFRIEND]</div>
- <div>[PRODUCTVARIANTS]</div>
- <div class="productDetailPadding">[PRODUCTVISUAZLIER]</div>
- <div class="genericColour addToCartWrapper">[ADDQUANTITY] [ADDTOCART]</div>
- <div>[ADDTOWISHLIST]</div>
- <div style="clear:both;"></div>
- <div class="Normal productDetailPadding">[FACEBOOKLIKEBUTTON]</div>
- </div>
- </div>
<div class="StoreDetailContainer">
  <div class="StoreDetailContainer-Content">
    <div class="Normal productDetailPadding">[EDIT][MODELNAME] - [MODELNUMBERVALUE] [SKINOBJECT:CURRENTDATE(DateFormat,"yyyy")]</div>
    <div class="Normal productDetailPadding">
        [MEDIUMIMAGE]
        <div style="clear:both;"></div>
        [ADDITIONALIMAGESGALLERY]
        <div style="clear:both;"></div>
        [DESCRIPTION]
    </div>
    <div class="StoreClear productDetailPadding">[MSRP]</div>
    <div class="StoreClear productDetailPadding">[PRICE] [VATPRICE]</div>
	<div class="Normal genericColour productDetailPadding">[AVERAGERATING]</div>
    <div class="productDetailPadding">[ADDTOCOMPARISONLIST]</div>
    <div>[EMAILAFRIEND]</div>
    <div>[PRODUCTVARIANTS]</div>
    <div class="productDetailPadding">[PRODUCTVISUAZLIER]</div>
    <div class="genericColour addToCartWrapper">[ADDQUANTITY] [ADDTOCART]</div>
     <div>[ADDTOWISHLIST]</div>
    <div style="clear:both;"></div>
    <div class="Normal productDetailPadding">[FACEBOOKLIKEBUTTON]</div>
  </div>
</div>
The output now simply shows the current year.

The ability to add skin objects into your templates opens up the range of possibilities and ideas you can now implement.
We aren’t finished there we have one more Skin Object trick which you can use to make great ecommerce sites, take a look at Using Skin Objects in Cart Viper – Part 2 to see how you can extend Cart Viper using templates.