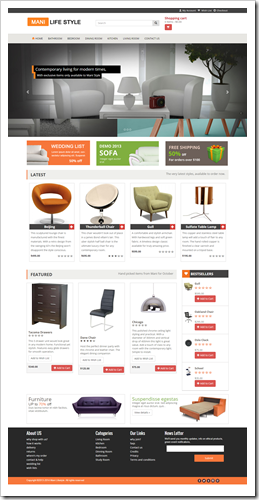
 The Cart Viper demo site was updated a while ago and we’ve had positive feedback from the DNN community. The site uses Twitter Bootstrap 3 and some razor scripts to demonstrate how easy it is to create great looking ecommerce sites using Cart Viper. With only a small amount of customization you can make a great looking ecommerce site which works great on mobile, tablet and desktop screens.
A number of people has asked us to release the skin and files we used to make the site. So in the blog post we are going to step through the process of how to install the files and give you some pointers where you can further customize the demo.
To get started we need to make a home page, store page, my account page and then just add the store admin page to the admin menu. Lets get started with making the changes!
Skin
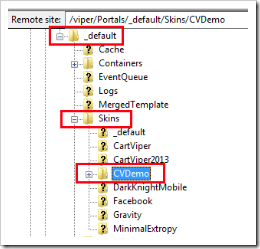
The skin used on the demo site is a custom design we had created then we converted this to a DNN skin. The skin file just needs unzipped and then copied to the folder /portals/_default/skins
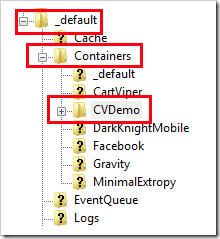
We need to also copy over the containers these need to go into /portals/_default/containers
Our skin contains a design used for the homepage and then a second design used for all the other pages in the site. The skin is design using Twitter Bootstrap 3 so we can then be responsive when viewing the site on a mobile device. It also means we can enable the responsive mode of Cart Viper to make all the store front responsive too.
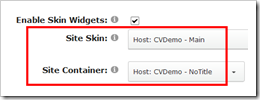
In the Site Setting - Appearance we set the skin to CVDemo - Main and we also set the container to the CVDemo - No Title container.
Pro Tip
Why buy a generic skin from the DNN Store when you can get a custom one cheaper? We got a custom made design using Twitter Bootstrap from a designer and then we just converted it to a skin ourselves all for less than the cost of an average skin on the store. Its a one off and designed to our requirements.
We posted the job on People Per Hour and found our designer on there. Its the fastest and cheapest way to get quality results.
The navigation menu used by the skin is a custom one we created using the DDR menu and a simple razor script. The script is located in the folder bootstrapNav inside the skin folder.
We are using some code to get all the top level categories in Cart Viper and then we output these into the menu. We also have hard coded a link to a contact page which is just a DNN page on the demo site.
On the home page of the site we define the skin to use for this page to the CVDemo - Home skin so that gives us the different look to the rest of the pages within the site.
Search and Mini Cart
At the top of every page we have the Search Input and Mini Cart control. These are not in fact Cart Viper modules, these are just two simple razor scripts that we have added to the header pane using the Razor Host Module which is part of the standard DNN install.

Firstly copy over all the /RazorHost files in download at the bottom of the page to the folder.
We’ll explain some more about all the files as we setup the home page of the site below.
/DesktopModules/RazorModules/RazorHost/Scripts
So just add two Razor Host modules to the pane at the top of the skin and then we just set one module to use the script CVSearchinput.cshtml and the other module to use CVMiniCart.cshtml. We have created a pane for each control namely searchInputPane and MiniCartPane and its those where you should place Razor Host modules.

We are also going to set both modules to display on all pages of our site, so that these two controls are available on every page.
Also if you look at the demo site, you’ll notice we have a link to the cart, wishlist and my account. This is done using the same idea. Just add a Razor Host module to the HeaderPane and define the script as CVHeaderLinks.cshtml then assign that module to all pages in the site.
Latest, Featured and Best Sellers
There are some other items we are going to add to the home page which give us some extra functionality when a customer first lands on the page.
We have a Latest items, Best Selling items and Featured items. All three of these are creating using Razor Host modules and three scripts we have wrote that pulls the products from Cart Viper.
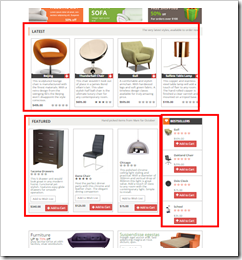
Add three Razor Host modules to the home page then just set the scripts to use as
- CVBestSellers.cshtml
- CVFeaturedProducts.cshtml
- CVHomePageLatest.cshtml
The products for each of the scripts comes from a category we have defined in the CV back office. We have a root category called _Meta which we have made sure in our other scripts is never rendered to the store front. We then have a sub category in there which maps products to the razor script.
It might sound complex but its very simple once you look at the razor scripts and the code we have written.
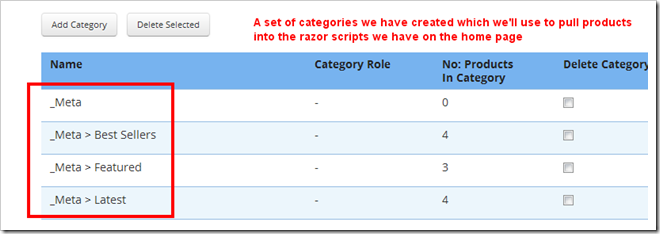
CV Template
We have made a lot of changes to the templates used in Cart Viper and added some razor scripts into the folders that the templates use. To set up those you just need to turn on Portal Templates and Responsive in the Store Admin – Store Info page.
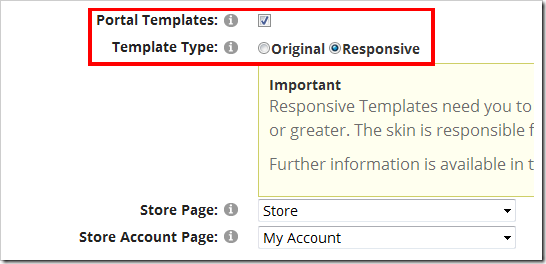
Once these are set we can just copy over the files in the folder CV_ResponsiveTemplates into the folder /Portals/X/CVStore/ResponsiveTemplate
Note X will be the portal ID of the portal you are using.
Please take a look at the html template files and the scripts sub folder to learn more about how we are making the store front.
Category Menu
On the product details page we display a category submenu which lists any subcategories contained within the currently selected category.
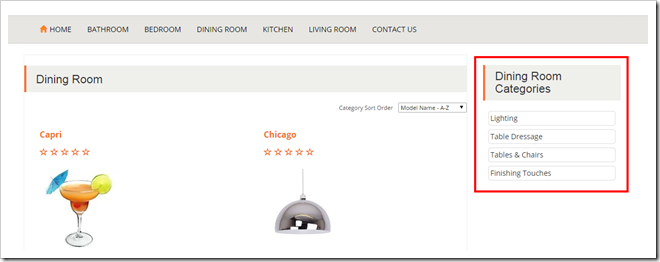
This again is a Razor Host module which we have added to the store page. The name of the script to use is CVCategorySubMenu.cshtml.
Going Further
We never intended to give the skins and files used on the demo site, so we recommend that you try out all the changes and make sure they match your requirements and you use the files as a jumping off point for customizing your store further. With that in mind we have a couple of ideas where you could extend the templates and design.
The navigation menu we use on the skin contains a hard coded link to a contact page, this could be changed to have some code which adds dynamicaly other pages defined within the portal.
You could just edit the razor script /Skins/CVDemo/bootstrapNav/CVNav.cshtml to do this.
On the product details template it would be good to add a related product selection, this could be as simple as using the name or keywords of the current product and doing a search against the catalogue for matching products then rendering those to the page.
On the cart page you could add some razor script to attempt to upsell some special offer item based on the contains of the cart.
Download
Download all the files for this blog post. CVDemo.zip (2.0Mb)