One of the great new features of Cart Viper 1.1 is the ability to import products directly from CSV data into the store.
From the outset we wanted to create something flexible that works with the data you already have, rather than you have to manually create the CSV file format to match our import routine.
To achieve this we created a flexible system that allows you to import the existing data simply by marking the CSV column headers using the pre-defined column.

Using this system you can import as many fields or as few as you require, additionally any other columns in CSV which aren't part of the pre-defined columns are simply ignored.
The CSV file should have the column headers as the first row.
A complete list of supported column names are available in the Cart Viper User Manual.
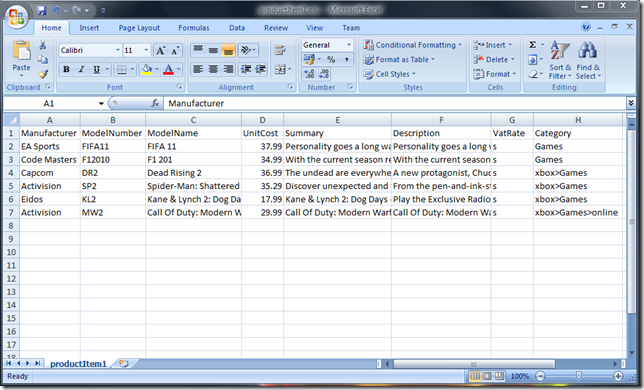
As well as importing products into the store you can optionally define the images and categories for the products.
Assigning Products to Categories
To assign products to categories simple add a column to the CSV file with a header of “Category”.
This column should then contain the category or categories to assign the product to. Multiple categories should be separated with a “;”.
For each category that the product is to be assigned to you should enter the full path to the category, taking into account the category hierarchy.
So for example if we have a parent category of “xbox” which contains a child category of “Games” then this should be entered as
xbox>Games
The important point to notice is that we use “>” as a separator to defined the category hierarchy.
Assigning Images to Products
Its also possible to define the images for the product. To import images simple add a column header called “Image” then enter the filename of the image.
Multiple images should be separated using “;” e.g.
product001.jpg;product001_alternative.jpg
The final step is to manually copy the images to the correct folder on your server, this will the allow Cart Viper to pickup the images and scale them to the correct size.
The folder is located at /Portals/x/CVStoreImages where x is the portalId of the portal where the store is installed.
Download a sample CSV below
productItem1.csv (2.34 kb)
4fc6d3e5-5c7f-45e6-865c-13364016bd50|0|.0|27604f05-86ad-47ef-9e05-950bb762570c
New in the latest release of Cart Viper is the Product Widget control.
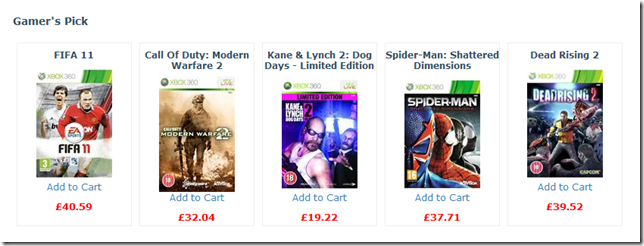
This controls allows you to display products outside of the store pages within your portal. So for example you could display some items directly on the home page of your portal.
The module has three different methods of product selection
- Top Sellers – Automatically displays the best selling items in your store
- New Items – Automatically displays new items added within the last 30 days
- Featured – Displays the products which you mark as featured
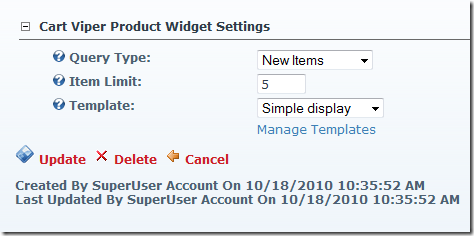
Once you’ve got your selected products to display, we then use a site wide template library to display the items.
You can define and create your own custom templates for your portal, then share and use them for each instance of the Product Widget Module you add to page.
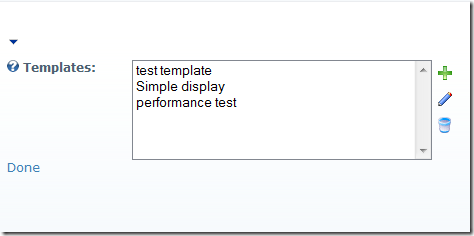
To get you started the module comes with a Simple display template you can use as the basis for your customisation.
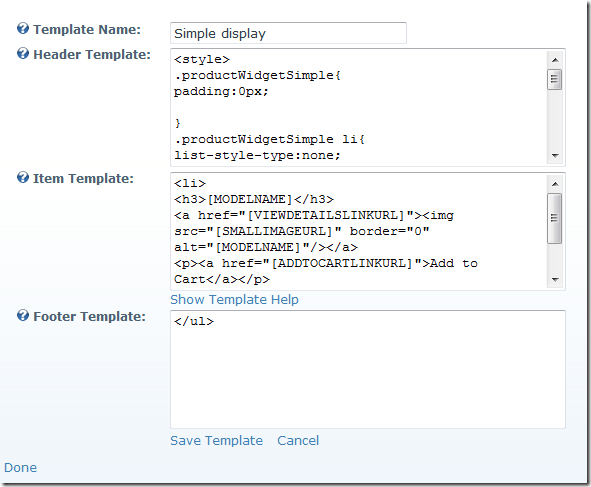
The Item template is used to render each item into the HTML which is displayed. Within the template you can add tokens which are replaced with the data from the product. As standard we have over 30 properties for an item which we expose as tokens.
<li>
<h3>[MODELNAME]</h3>
<a href="[VIEWDETAILSLINKURL]"><img src="[SMALLIMAGEURL]" border="0" alt="[MODELNAME]"/></a>
<p><a href="[ADDTOCARTLINKURL]">Add to Cart</a></p>
<span class="pwsPrice">£[UNITPRICEINCTAX]</span>
</li>
The code snippet above shows the Simple Display’s Item Template, as you can see we are using the tokens to inject the data for the product into the html we display on the page.
Using some CSS and jQuery code you could create a very distinctive display of products anyway on your portal. Look out for a future blog post where we create a template using jQuery as an example.
471ffc4b-3d25-419d-bfea-41cbff2c0b4f|0|.0|27604f05-86ad-47ef-9e05-950bb762570c
When adding new products to your store there may come a time when you have a similar item already that you would like to duplicate and clone to create the new item.
Now in release 1.1.0 of Cart Viper this is possible.
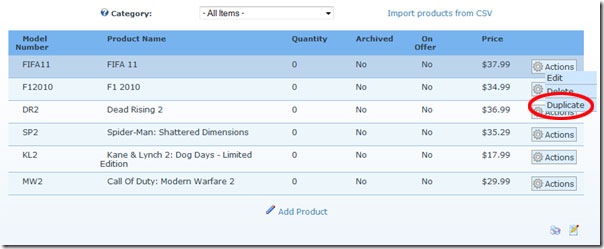
When you duplicate an existing product all the product details, category assignments, variants, offers, downloads, images and related products are copied to the new product.
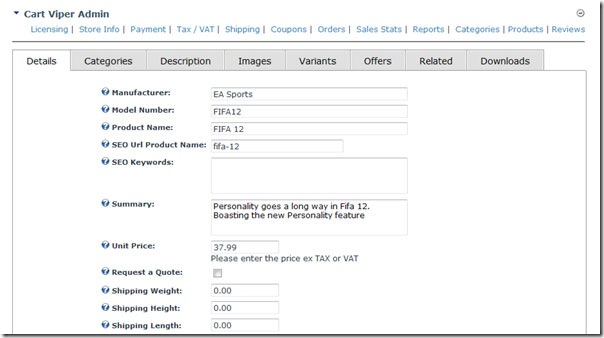
Once duplicated you can modify the fields of the newly cloned product.
2914a391-d487-4a77-8724-f18257a880c4|0|.0|27604f05-86ad-47ef-9e05-950bb762570c
 Today we’ve release version 1.1.0 of Cart Viper our ecommerce store for DotNetNuke. Since the last release 4 weeks ago we’ve been busy adding and improving on our module.
New features in this release are
- Import products using CSV into the catalogue
- Create new products by duplicating an existing product
- Automatically Email customers a newsletter containing recently added items
- Discount coupons for both percentage and monetary amounts.
- Product Widget Control allows you to display selected products outside of the standard store pages.
- Improved AJAX cart - now supports the ability to go straight to the basket after adding an item, ability to display the modal confirmation popup.
- Anonymous guest checkout, no need for users to register to purchase anymore.
As always we offer a full 14 day free trial, no registration required and all customers receive free life time upgrades.
Available to purchase via Snowcovered or direct.
9d7a4dc7-cadd-46c2-b3c1-5d5f95226aa8|0|.0|27604f05-86ad-47ef-9e05-950bb762570c
Based on user feedback we have also added some new checkout options that you can configure in version 1.1.0 of Cart Viper to give you all the flexibility you need. If you have any feature requests please contact us and we would be happy to discuss them with you.
Anonymous Checkout
The store admin can now define if they would like to allow users to checkout anonymously or if they must register for an account before they can checkout.
Display Basket After Add To Cart
It is now also possible for the store admin to decide to send the user to the cart details page after an item has been added to cart, rather than stay on the current page.
Optionally Disable Modal Popup Window After Add To Cart
Once a user has added an item to their cart the admin has the option to disable the modal popup window that confirms the item has been added to cart, see below:
![CropperCapture[78] CropperCapture[78]](http://blog.cartviper.com/image.axd?picture=CropperCapture%5B78%5D_thumb.png)
Instead they can display a less intrusive message that appears in the top right hand side of the website and fades out after a few seconds, see below:
![CropperCapture[77] CropperCapture[77]](http://blog.cartviper.com/image.axd?picture=CropperCapture%5B77%5D_thumb.png)
In both cases all text is stored in .ascx.resx files so they can be altered to suit your needs or translated into the language of your choice.
4156c2df-b298-4657-bbcf-653380d908e3|0|.0|27604f05-86ad-47ef-9e05-950bb762570c
Following on our discussion of new features in release 1.1.0 of our DotNetNuke ecommerce solution Cart Viper, this blog will focus on the product news letter feature.
![CropperCapture[60] CropperCapture[60]](http://blog.cartviper.com/image.axd?picture=CropperCapture%5B60%5D_thumb.png) To allow a user to receive the product newsletter they must first enter their email address in the module on the left and then click the randomly generated link that is emailed to them to confirm they own the email address. They can also unsubscribe via this module or by clicking the link that is included in the product email newsletter.
To allow a user to receive the product newsletter they must first enter their email address in the module on the left and then click the randomly generated link that is emailed to them to confirm they own the email address. They can also unsubscribe via this module or by clicking the link that is included in the product email newsletter.
Once they have subscribed to the newsletter they will automatically receive the product newsletter via email. The newsletter is HTML enabled and contains product title, description, images, price / special offers and links to the product details page on your store.
The below screenshot highlights the options the store admin has when they configure the newsletter:
![CropperCapture[641] CropperCapture[641]](http://blog.cartviper.com/image.axd?picture=CropperCapture%5B641%5D_thumb.png)
Within the settings you can define how often in days the newsletter is sent, how old the products should be that are included in the newsletter as well as the website domain that Cart Viper is hosted on.
So in our example above we will send out the newsletter every 10 days, include products that have been added to the store within the last 5 days of the newsletter being sent and we are defining our domain to be http://www.cartviper.com.
60c52813-ad18-424c-b5d3-7a87229f29b2|0|.0|27604f05-86ad-47ef-9e05-950bb762570c
After another hectic few weeks of coding we are close to the release of 1.1.0 of Cart Viper our DotNetNuke ecommerce solution. This release is packed full of new features that we are proud of, like in our previous releases we will post a blog on each new feature, this post will cover Coupons:
The store admin can now create an unlimited amount of coupons that can be then used by customers to receive the predefined discount of their purchases. When defining the coupon the admin has the ability to configure rules on how the coupon can be used.
For example they can define:
- Minimum subtotal before the coupon can be used.
- An expiry date.
- If the coupon can be used once or multiple times.
- If the discount should be a monetary discount or a percentage of the subtotal.
The flexibility when creating coupons should allow you to create the ideal tool to help promote sales in the build up to Christmas!

33a15ff5-5afd-40e2-aed1-398855e364be|0|.0|27604f05-86ad-47ef-9e05-950bb762570c