Part 1 of of using skin object in Cart Viper focused on using an existing skin objects to add content to the templates used in our module. This part will focus on how to create custom skin objects to manipulate the product and category objects in Cart Viper.
Since release 1.4.0 we have add the ability for you to customise the output of the store using skin object, today I want to show you an advanced feature that lets you write custom code in .net to create skin objects which you can use in the store templates.
Lets take an example, I’ve got my store all setup but really want to display the logo for the manufacturer of each product. Cart Viper has no way to do this, however creating a custom skin object we can read the manufacturer value for the product and output a logo with ease.
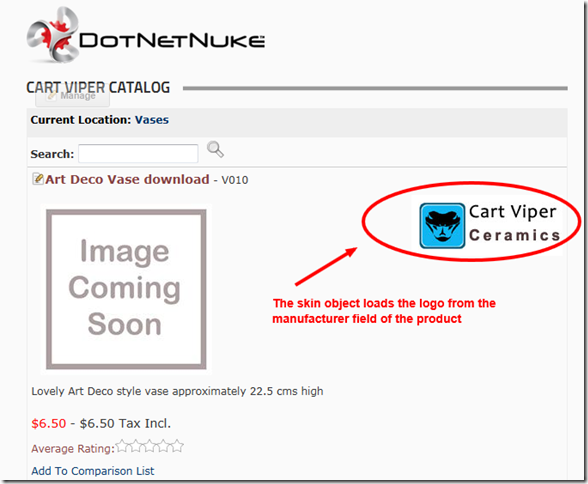
Displaying a Manufacturer Logo for a Product
Lets take a walk through creating the skin object to see how it works.
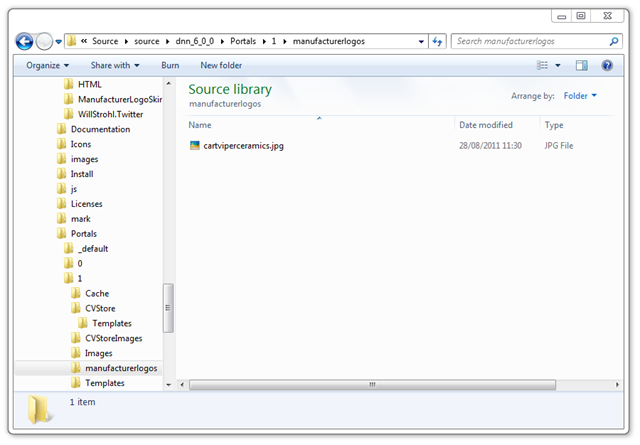
First I’ve uploaded my logos into a folder I’ve created in my portal home directory. I’m going to have my skin object display these on the product details page.
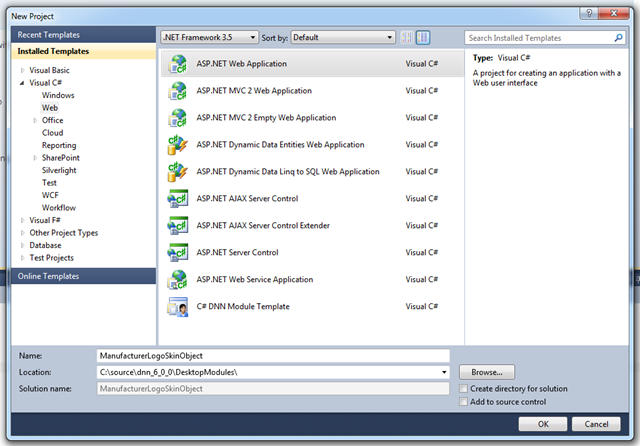
Next I’m going to create a new project in Visual Studio, I just need a Web Application Project, its important that we create this with in the DesktopModules folder. Notice that we don’t need to check “Create directory for solution”.
In order to create a skin object we need to inherit from a base class in DotNetNuke plus we want to use an interface from Cart Viper to allow the skin object to get Product object.
So we need to add two references to files located in the /bin folder of the portal.
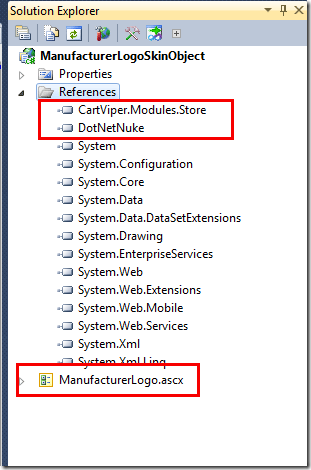
When first creating the project Visual Studio will create some default folders and files which we don’t need so I’ve deleted those and added a single web User Control called ManfacturerLogo.ascx.
An important setting you need to make is to have the build output directly into the /bin folder of the portal.
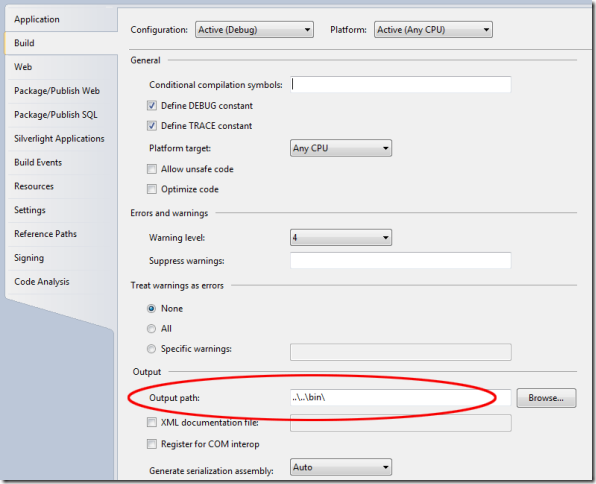
Lets take a look at the code in the ascx file, I’ve just got an image control which will output the logo for the manufacturer.
<%@ Control Language="C#" AutoEventWireup="true"
CodeBehind="ManufacturerLogo.ascx.cs"
Inherits="ManufacturerLogoSkinObject.ManufacturerLogo" %>

<asp:Image runat="server" ID="imgManLogo" Visible="false"/>
Looking at the code behind file shows how the skin object works.
using System;
using System.Collections.Generic;
using System.Linq;
using System.Web;
using System.Web.UI;
using System.Web.UI.WebControls;
using DotNetNuke.UI.Skins;
using CartViper.Modules.Store.Components.SkinObject;

namespace ManufacturerLogoSkinObject
{
    public partial class ManufacturerLogo : SkinObjectBase, ICartViperSkinObject
    {
        protected void Page_Load(object sender, EventArgs e)
        {
            if (Product != null)
            {
                //get the manufacturer value, if its not null or empty
                //make into the path to the url for the logos folder
                string manufacturer = Product.Manufacturer;
                if (!string.IsNullOrEmpty(manufacturer))
                {
                    imgManLogo.ImageUrl = string.Format(
											PortalSettings.HomeDirectory +
											"ManufacturerLogos/{0}.jpg",
											manufacturer.Replace(" ", ""));

                    imgManLogo.AlternateText = manufacturer;
                    imgManLogo.Visible = true;
                }
            }
        }


        public CartViper.Modules.Store.Catalog.CategoryInfo Category
        {
            get;
            set;
        }

        public CartViper.Modules.Store.Catalog.ProductInfo Product
        {
            get;
            set;
        }
    }
}
Looking at the code the important parts to notice the class inheritance, we need to use SkinObjectBase which is located in the DotNetNuke.UI.Skins as the base class.
We are also implementing the interface CartViper.Modules.Store.Components.SkinObject.ICartViperSkinObject this interface allows the template engine in Cart Viper the ability to set the properties Category and Product with the current product data.
Note its only in the following templates that the ICartViperSkinObject properties will be set by the template engine.
- ProductDetail.htm
- ProductList.htm
In other templates the Category and Product properties will not be set and will be null.
The main work is completed in the Page_Load method, we check to see if we have Product object and then if the product has a value for the manufacturer property. We then remove all spaces from the manufacturer value and load that as the image source.
To use the module in DotNetNuke we need to have a DNN file to install the skin object.
<?xml version="1.0" encoding="utf-8" ?>

<dotnetnuke type="Package" version="5.0">
    <packages>

    <package name="ManufacturerLogo" type="SkinObject" version="01.00.00">
        <friendlyName>ManufacturerLogo</friendlyName>
        <description>ManufacturerLogo</description>
        <owner>
            <name>Cart Viper</name>
            <organization>CartViper</organization>
            <url>www.cartviper.com</url>
            <email>mark@cartviper.com</email>
        </owner>
        <license/>
        <releaseNotes/>
        <components>
            <component type="SkinObject">
                <moduleControl>
                    <controlKey>MANUFACTURERLOGO</controlKey>
                    <controlSrc>
			DesktopModules\ManufacturerLogoSkinObject\ManufacturerLogo.ascx
					</controlSrc>
                    <supportsPartialRendering>False</supportsPartialRendering>
                </moduleControl>
            </component>
            <component type="File">
                <files>
                    <basePath>
					DesktopModules\ManufacturerLogoSkinObject
					</basePath>
                    <file>
                        <name>ManufacturerLogo.ascx</name>
                    </file>
                </files>
            </component>
            <component type="Assembly">
                <assemblies>
                    <assembly>
                        <path>bin</path>
                        <name>ManufacturerLogoSkinObject.dll</name>
                        <version>01.00.00</version>
                    </assembly>
                </assemblies>
            </component>
        </components>
    </package>

    </packages>
</dotnetnuke>
Then finally we just add the skin object into our ProductDetail.htm to get the manufacturer logo into the product details page.
<div class="StoreDetailContainer">
  <div class="StoreDetailContainer-Content">
    <div class="Normal productDetailPadding">[EDIT][MODELNAME] - [MODELNUMBERVALUE]</div>
    <div style="float:right">[SKINOBJECT:MANUFACTURERLOGO]</div>
    <div class="Normal productDetailPadding">
        [MEDIUMIMAGE]
        <div style="clear:both;"></div>
        [ADDITIONALIMAGESGALLERY]
        <div style="clear:both;"></div>
        [DESCRIPTION]
    </div>
    <div class="StoreClear productDetailPadding">[MSRP]</div>
    <div class="StoreClear productDetailPadding">[PRICE] [VATPRICE]</div>
	<div class="Normal genericColour productDetailPadding">[AVERAGERATING]</div>
    <div class="productDetailPadding">[ADDTOCOMPARISONLIST]</div>
    <div>[EMAILAFRIEND]</div>
    <div>[PRODUCTVARIANTS]</div>
    <div class="productDetailPadding">[PRODUCTVISUAZLIER]</div>
    <div class="genericColour addToCartWrapper">[ADDQUANTITY] [ADDTOCART]</div>
     <div>[ADDTOWISHLIST]</div>
    <div style="clear:both;"></div>
    <div class="Normal productDetailPadding">[FACEBOOKLIKEBUTTON]</div>
  </div>
</div>
Conclusion
Using skin objects is a great way to customise Cart Viper, its lets you inject your own code and UI controls into the templates. Using this feature will let you tailor Cart Viper to your requirements with ease.
Download the source file